Build a shop with Next.js and Stripe
This article is part of a series, find the rest of the parts here:In this series I’m going to walk through the process of building an online shop using the React Framework Next.js. You may have built a website before using the likes of Create React App which will get you the bare bones together to start building. But it doesn’t get you that far before you have a huge amount of decisions to make. What routing should I use for my pages? What CSS in JS library? Should I use Tailwind? Will my website have good SEO? Very quickly you can be overloaded with decisions. This stems mostly from the fact that React is not a framework. It’s a library.
Next.js on the other hand is “The React Framework for Production”. With it a lot of the decisions have been made for you, letting you get up and running much faster. More importantly it solves a lot of the common problems that building a website/web app entail.
You will need to have an understanding of HTML, CSS and React of course to follow along with this series. I teach all these subjects at Developers Institute where I’m a Tech Lead 😉
To get started building a Next.js application, hopefully you have Node installed ( if not download here ) and open up your terminal.
npx create-next-app@latestFollow the prompts and give it a name “shop-nextjs-stripe”
Head into the directory with your new project and start the local development.
cd shop-nextjs-stripe
npm run dev
Open your code editor and take a look at the folder structure. You will see 3 folders. The “pages” folder is where the routing happens. That will direct the url page in your app. For example if you had a file called contact-us.js to be routed to it you would have the following url your browser http://localhost:3080/contact-us. This will show the content from that component.
Your pages folder will have a api folder and two files _app.js and index.js.
Open the project in a browser and you should see something like this
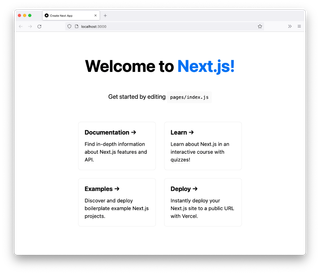
Great the project is up and running in development mode 🙌
In your code editor (I suggest you use VS Code) we will open the index.js file in the pages folder.
We are going to remove everything and replace it with the following:
import Head from "next/head";

export default function Home() {
  return (
    <>
      <Head>
        <title>Products</title>
        <meta name="description" content="Products" />
      </Head>
    </>
  );
}
That’s cleared the standard install documentation links. Time to make our first component. Let’s make a new folder called components and add a file layout.js in that directory. Add the following:
import React from "react";
import Head from "next/head";

import styles from "../styles/layout.module.css";

export const Layout = ({ children }) => {
  return (
    <>
      <Head>
        <link rel="icon" href="/favicon.ico" />
      </Head>
      <div className={styles.container}>
        <main className={styles.main}>{children}</main>
      </div>
    </>
  );
};
This will be the layout shared across all our pages in the shop. To add to that we will add a Header and a Footer component.
Again in the components folder create a header.js and a footer.js file.
In the header file add the following:
import React from "react";

export const Header = () => {
  return <header></header>;
};
In the footer file add the following:
import React from "react";

export const Footer = () => {
  return <footer></footer>;
};
We need to update the layout component like so (see the comments in the code):
import React from "react";
import Head from "next/head";

// Add the following imports
import { Header } from "./header";
import { Footer } from "./footer";

import styles from "../styles/layout.module.css";

export const Layout = ({ children }) => {
  return (
    <>
      <Head>
        <link rel="icon" href="/favicon.ico" />
      </Head>
      {/* Add the Header */}
      <Header />
      <div className={styles.container}>
        <main className={styles.main}>{children}</main>
      </div>
      {/* Add the Footer */}
      <Footer />
    </>
  );
};
We now have a Layout component we can re-use throughout our application with the Header and Footer on every page. We can pass the content for the page via the children prop.
You may have noticed we have a reference to a CSS module but haven’t added that to the styles folder yet. By default Next.js supports CSS modules, the major benefit with CSS modules is we can avoid CSS name collisions (it makes unique CSS class names) and feel comfortable to delete an unused CSS file as we know it’s only relevant to one component. CSS Tricks has a series on CSS Modules worth reading to get a better understanding.
Notice that the corresponding CSS classes above are referenced as a JavaScript object e.g.
<div className={styles.container}>
Let’s add the CSS and it’s file. Create a layout.module.css file in the styles folder with the following code:
.container {
  min-height: 90vh;
  display: flex;
  flex-direction: column;
  justify-content: flex-start;
}
.main {
  padding: 5.3rem 0 1rem 0;
  margin: 0;
  flex: 1;
  display: flex;
  flex-direction: column;
  align-items: center;
}
Now we can add the Layout component to every page. Let’s add it to the index.js:
import Head from "next/head";
import styles from "../styles/Home.module.css";

// Import the layout components
import { Layout } from "../components/layout";

export default function Home() {
  return (
    <>
      <Head>
        <title>Products</title>
        <meta name="description" content="Products" />
      </Head>

      {/* Add the Layout component to the Home page. */}
      <Layout></Layout>
    </>
  );
}
Let’s start putting some content in to the Header component. Let’s start off by adding some <div> tags to store a logo and some icons.
import React from "react";

import styles from "../styles/header.module.css";

export const Header = () => {
  return (
    <header className={styles.header}>
      <div className={styles.mainNav}>
        <div className={styles.iconNav}>
          <nav></nav>
        </div>
      </div>
    </header>
  );
};
And the subsequent CSS styles
.header {
  width: 100%;
  height: 4.4rem;
  border-bottom: 1px solid #eaeaea;
  display: flex;
  justify-content: center;
  align-items: center;
  position: fixed;
  background-color: var(--bg-color);
  z-index: 10;
}
.iconNav ul {
  list-style: none;
  display: flex;
}
.mainNav {
  display: flex;
  justify-content: space-between;
  width: 100%;
  max-width: var(--max-cont-width);
}
.logo {
  color: var(--font-color);
  cursor: pointer;
  width: 4rem;
  height: 4rem;
}
We also need to update the global.css file with these variables. Add them to the very top of the file.
:root {
  --font-color: #111;
  --icon-color: #111;
  --bg-color: #fff;
  --max-cont-width: 63rem;
}
Time to add some icons, we are going to use Heroicons in this project. In the terminal run:
npm i @heroicons/reactWe can add them to the header.js file like so.
import React from "react";

// icons added
import {
  MagnifyingGlassIcon,
  BuildingStorefrontIcon,
  Bars3Icon,
} from "@heroicons/react/24/solid";

// outline icon added
import { ShoppingBagIcon } from "@heroicons/react/24/outline";

import styles from "../styles/header.module.css";

export const Header = () => {
  return (
    <header className={styles.header}>
      <div className={styles.mainNav}>
        <BuildingStorefrontIcon className={styles.logo} />

        <div className={styles.iconNav}>
          <nav>
            <ul>
              <li>
                <MagnifyingGlassIcon className={styles.searchIcon} />
              </li>
              <li>
                <ShoppingBagIcon className={styles.cartIcon} />
              </li>
              <li>
                <Bars3Icon className={styles.menuIcon} />
              </li>
            </ul>
          </nav>
        </div>
      </div>
    </header>
  );
};
Also add corresponding CSS for the icons.
.searchIcon {
  width: 1.5em;
  height: 1.5em;
  color: var(--icon-color);
  margin-right: 0.5rem;
}
.cartIcon {
  width: 1.5em;
  height: 1.5em;
  color: var(--icon-color);
  margin-right: 0.5rem;
}
.menuIcon {
  width: 1.5em;
  height: 1.5em;
  color: var(--icon-color);
  margin-right: 0.5rem;
}
We are almost done, lets add a footer and style it.
import React from "react";
import styles from "../styles/footer.module.css";
export const Footer = () => {
return (
<footer className={styles.footer}>
<div className={styles.footerCont}>
<nav className={styles.footerNav}>
<ul>
<li>Find a Store</li>
<li>Sign up for Email</li>
<li>Become a Member</li>
<li>Feedback</li>
</ul>
</nav>
<div className={styles.copyright}>© 2022 Online Shop</div>
</div>
</footer>
);
};Add a new file to the styles folder footer.module.css. Then add the following CSS.
.footer {
  width: 100%;
  height: 11rem;
  display: flex;
  justify-content: center;
  align-items: center;
  background-color: var(--font-color);
  color: #fff;
  flex-direction: column;
}
.footerCont {
  max-width: var(--max-cont-width);
  margin: 0 auto;
  padding: 0 1.6rem;
  width: 100%;
}
.footerNav ul {
  display: flex;
  flex-direction: column;
  list-style: none;
  margin: 0;
  padding: 0;
}
.footerNav li {
  padding: 0.3rem 0;
  text-transform: uppercase;
  font-size: 0.8rem;
}
.copyright {
  font-size: 0.8rem;
  opacity: 0.8;
  margin-top: 0.6rem;
}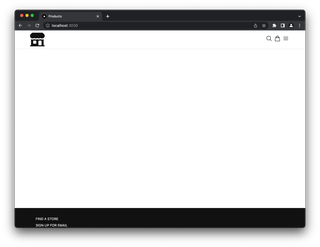
Alright that’s quite a bit we’ve done here, congrats if you got this far 👍. We have the shell of the shop. Next up we need to set up Stripe to store our product info, product images and prices.
Please subscribe to get notified of the next installment in this series.